Featured
Upper Body Strength Workout: Effective Exercises for Arms, Chest, and Back
By shaneforrester
September 13, 2026
Field Notes

Want stronger arms, chest, and back without wasting time on random workouts?
This upper body strength workout gives a simple, complete plan that works from beginner to advanced.
You’ll get compound lifts and targeted moves, warm-up and mobility, plus progressions and regressions so every session builds you up.
Follow it for a few weeks and you’ll notice better posture, easier lifting of groceries, and shirts that fit differently.
No gym drama, just steady progress.
Complete Upper‑Body Workout Routine (Beginner to Advanced)

Upper body strength training hits the muscles you use to push, pull, carry, and reach. We’re talking chest, shoulders, back, biceps, triceps, plus all the smaller stabilizers tucked in between. A balanced routine covers these zones and builds functional strength that shows up in real life. Lifting groceries, moving furniture, playing with kids, or just feeling solid in your own skin.
Your starting point depends on where you are right now with controlled bodyweight movements. Can you bang out 10 to 15 clean push-ups without your hips sagging? You’re probably ready for light dumbbells and basic barbell work. If push-ups are still a struggle (or you’re starting from scratch), begin with incline or wall variations and build from there. Advanced lifters can handle heavy compound lifts with strict form and layer on intensity through tempo changes, higher volume, or tighter rest periods. But the goal stays the same across the board: progressive overload. Making workouts a little harder over time.
Stick to a structured plan, eat enough protein, and give your body time to recover between sessions. Within a few weeks you’ll notice better posture, less shoulder fatigue at your desk, and shirts that fit differently across the chest and arms. Strength and muscle size both improve when you stay consistent. The workout below covers all major upper body muscle groups with a mix of compound lifts and targeted accessory work.
10 Key Upper‑Body Exercises
- Push-Up – Foundational press for chest, shoulders, and triceps. Scales from wall to weighted versions.
- Dumbbell Bench Press – Horizontal press that builds chest and front deltoids with independent arm work.
- Barbell Bent-Over Row – Heavy horizontal pull for mid-back, lats, and rear shoulders.
- Overhead Press – Vertical press targeting shoulders and triceps. Requires core stability.
- Pull-Up or Lat Pulldown – Vertical pull for lats and biceps. Pull-ups demand full bodyweight control.
- Dumbbell Shoulder Press – Unilateral shoulder builder with natural range of motion.
- Single-Arm Dumbbell Row – Unilateral back pull that isolates each side and improves grip strength.
- Dips – Compound triceps and chest exercise. Bodyweight or weighted.
- Biceps Curl – Isolation movement for biceps and forearms. Multiple grip options.
- Triceps Extension – Isolation for triceps. Overhead or lying variations increase stretch.
Essential Warm‑Up and Mobility for Upper‑Body Training

Jumping straight into heavy pressing or rowing is a fast track to tweaking a shoulder or straining a lat. A proper warm-up increases blood flow to the muscles, lubricates your joints, and primes your nervous system so you can lift with better form and lower injury risk. Five to twelve minutes of dynamic movement before you touch a barbell makes a real difference in how the session feels and how much weight you can safely move.
Start with light cardio. Row machine, bike, or jumping jacks for about five minutes, just enough to break a light sweat. Then move into joint specific mobility and activation drills that target the shoulders, chest, and thoracic spine. These aren’t static stretches where you hold a position. They’re controlled movements that take your joints through their full range while your muscles stay active.
6 Dynamic Warm‑Up Movements
- Shoulder Circles – 10 forward, 10 backward, arms straight. Loosens the shoulder capsule.
- Chest Openers – Clasp hands behind your back, lift and squeeze shoulder blades. Hold for 10 breaths.
- Band Pull-Aparts – 2 sets of 15. Activates rear delts and mid-back.
- Trunk Rotations – Seated or standing, rotate torso side to side for 30 seconds. Warms thoracic spine.
- Scapular Push-Ups – Plank position, protract and retract shoulder blades without bending elbows. 2 sets of 8.
- Arm Swings – Cross body and overhead swings for 30 seconds. Primes shoulders for pressing and pulling.
Equipment Options: Bodyweight, Free Weights, and Machines
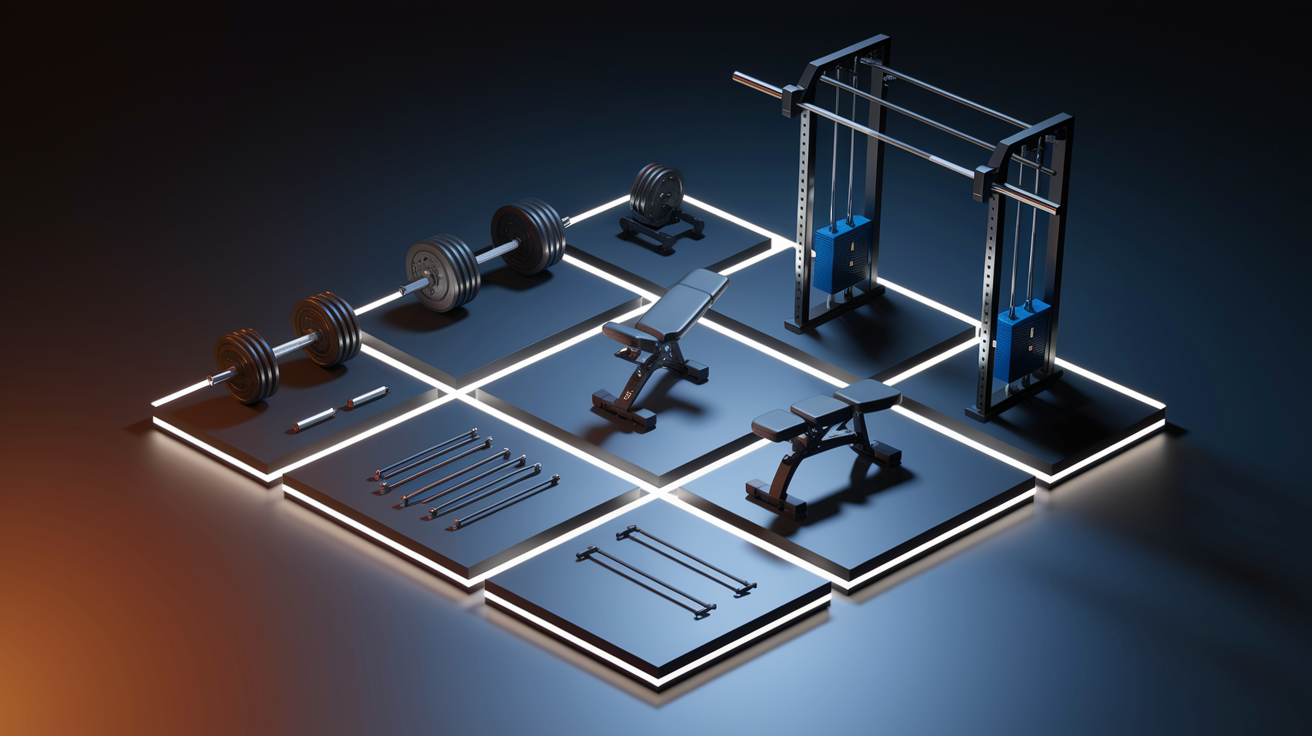
Every piece of equipment changes how resistance hits your muscles. Dumbbells let each arm work independently, so your stronger side can’t compensate for the weaker one. Barbells allow you to load heavier because both hands share the weight, which is great for building raw pressing and rowing strength. Machines guide the movement path and take balance out of the equation, making it easier to focus on squeezing the target muscle. Especially useful when you’re fatigued or learning a new pattern.
Bodyweight exercises like push-ups, inverted rows, and dips are the most accessible starting point and scale surprisingly well. You can adjust difficulty by changing leverage. Elevate your feet for harder push-ups, use assistance bands for pull-ups, or add a weighted vest once bodyweight feels easy. Free weights (dumbbells, barbells, kettlebells) demand more stabilization, which recruits more muscle and improves coordination. Machines shine for isolating specific muscles or working around an injury, and cable systems offer constant tension through the full range of motion.
Training at home? An adjustable dumbbell set ($120 to $400) and a pull-up bar ($20 to $80) cover most bases. Add a flat bench ($80 to $300) and you can hit every major upper body movement. Resistance bands ($15 to $60) are cheap, portable, and surprisingly effective for warm-ups, accessory work, and travel workouts. If budget or space is tight, start with bodyweight progressions and bands. You can build serious strength before you ever need iron.
6 Equipment Categories and Ideal Uses
- Adjustable Dumbbells – Unilateral pressing, rowing, and curls. Allows small load jumps.
- Barbell + Plates – Heavy compound lifts (bench press, overhead press, bent rows). Bilateral strength.
- Pull-Up Bar – Vertical pulling. Bodyweight or weighted. Develops lats and grip.
- Flat/Incline Bench – Supports pressing and rowing variations. Adjustable models add versatility.
- Resistance Bands – Warm-up activation, accessory work, assisted pull-ups, constant tension rows.
- Cable Machine – Isolation exercises (face pulls, triceps pushdowns, cable flys). Smooth resistance curve.
Proper Form and Technique for Safe Upper‑Body Lifts

Good form isn’t just about avoiding injury. It’s about making each rep count. When your joints are stacked correctly and your muscles fire in the right sequence, you get better activation, more strength gains, and less wasted energy. Sloppy reps teach bad patterns that become harder to fix the longer you practice them. If you’ve ever felt a twinge in your shoulder during a press or noticed your lower back arching off the bench, form is the first place to look.
For any pressing movement (bench press, overhead press, push-ups), keep your shoulder blades pulled back and down. Think “chest proud.” Your elbows should track at roughly a 45 degree angle to your torso, not flared straight out to the sides. Lock your core like you’re bracing for a gut punch. That protects your spine and transfers force more efficiently. Never fully lock your elbows at the top of a press. Leave a tiny bend to keep tension on the muscle and stress off the joint.
Pulling movements (rows, pull-ups, lat pulldowns) start with scapular retraction. Squeeze your shoulder blades together before you bend your elbows. Drive your elbows back and slightly down, not straight out to the sides. Keep your chest up and spine neutral. Rounding your upper back shifts work away from your lats and onto your lower back. At the bottom of each pull, let your shoulders stretch forward slightly without collapsing your posture. That full range builds more muscle and mobility.
Control your tempo. A slow, controlled lowering phase (the eccentric) creates more time under tension and builds strength through the full range of motion. Dropping the weight fast might feel easier in the moment, but you’re leaving gains on the table and increasing injury risk. Aim for a two second lower, brief pause, then a smooth one second press or pull. If the weight moves so fast you can’t control it, go lighter.
5 Common Upper‑Body Lifting Mistakes
- Flared Elbows During Pressing – Increases shoulder impingement risk. Keep elbows roughly 45 degrees to torso.
- Rounded Shoulders in Rows – Shifts load to lower back. Retract scapula first, then pull.
- Locked-Out Elbows at Top of Press – Stresses joints and reduces muscle tension. Keep a micro-bend.
- Arched Lower Back on Bench – Excessive arch uses momentum and strains spine. Ribcage stays down.
- Using Momentum to Swing Weights – Cheats the target muscle. Slow the rep and drop the load.
Progressions and Regressions for All Fitness Levels

The beauty of these core movements is that they scale up and down without needing a completely different exercise. Progressions add load, range of motion, or complexity. Regressions simplify the movement or reduce leverage so you can nail the pattern before you add intensity. A push-up is still a push-up whether you’re doing it against a wall or with a 45 pound plate on your back. The foundational pattern stays the same.
If standard push-ups are too hard right now, start with wall or countertop push-ups. As you get stronger, move your hands to a lower surface. A chair, then a low step, then the floor. Once floor push-ups feel solid, elevate your feet on a bench or add a weighted vest. The same logic applies to pull-ups: begin with band assisted pull-ups or inverted rows on a bar set to waist height. Progress to negative pull-ups (jump to the top, lower slowly), then full pull-ups, then weighted pull-ups with a dip belt or vest.
For dumbbell and barbell lifts, start with a weight that lets you complete all reps with perfect form and a rep or two left in the tank. Add 1 to 2 reps each session until you hit the top of your target range (for example, 3 sets of 12), then increase the load by 2.5 to 5 pounds and drop back to the bottom of the range. That simple cycle (reps up, then weight up) is progressive overload in action. If a movement feels awkward or painful, regress to a simpler variation, fix your form, and build back up. There’s no trophy for rushing.
8 Scaling Examples for Major Movements
- Push-Up Regression – Wall push-ups, countertop push-ups, floor push-ups.
- Push-Up Progression – Feet elevated push-ups, weighted vest push-ups, single arm progressions.
- Pull-Up Regression – Band assisted pull-ups, negative pull-ups, full pull-ups.
- Pull-Up Progression – Weighted pull-ups, tempo pull-ups (slow eccentric), L-sit pull-ups.
- Dumbbell Press Regression – Reduce weight, reduce range of motion, use lighter unilateral work.
- Dumbbell Press Progression – Increase weight, add tempo (3 second lower), single arm press for stability.
- Row Regression – Inverted row at higher bar height, bodyweight inverted row, light dumbbell row.
- Row Progression – Increase dumbbell weight, barbell bent-over row, weighted vest inverted row.
Weekly Training Schedule and Recovery Guidelines

Your muscles don’t grow in the gym. They grow while you rest. Upper body muscle groups typically need 48 to 72 hours to recover from a hard training session, which is why most people see the best results training upper body two to three times per week. That doesn’t mean you sit on the couch the other days. You can train lower body, do cardio, work on mobility, or take a full rest day. The key is not hammering the same muscles back to back without recovery time.
Beginners do well with two full upper body sessions per week, ideally spaced three or four days apart. Like Monday and Thursday. Each session hits all the major pushing and pulling movements with moderate volume (three sets of 8 to 12 reps). Intermediate lifters can handle three sessions per week or switch to a four day split that separates upper and lower body. Advanced lifters often run four or more sessions using push/pull splits, where one day focuses on chest, shoulders, and triceps, and the next day targets back and biceps.
Recovery isn’t just about rest days. Sleep is when most muscle repair happens. Aim for seven to nine hours. Protein intake matters too. Shoot for around 1.6 to 2.2 grams per kilogram of bodyweight per day if you’re trying to build muscle. Hydration, light activity (walking, stretching), and managing stress all play a role in how well you bounce back. If you’re constantly sore, struggling to hit your usual reps, or feeling run-down, you might be under recovering. Scale back volume or take an extra rest day.
Every four to twelve weeks, depending on how hard you’ve been pushing, consider a deload week. Drop your training volume by 30 to 50 percent. Fewer sets, lighter weights, or both, while keeping the same movement patterns. It feels weird to intentionally back off, but a deload lets your joints and nervous system catch up. You’ll often come back stronger the following week.
4 Weekly Schedule Templates
- Beginner (2×/week) – Monday: Full upper body, 3 sets × 8 to 12 reps, 60 to 90s rest. Thursday: Repeat same session.
- Intermediate (3×/week) – Monday: Push focus (chest, shoulders, triceps). Wednesday: Pull focus (back, biceps). Friday: Full upper body hypertrophy.
- Upper/Lower Split (4×/week) – Monday/Thursday: Upper body (all muscle groups). Tuesday/Friday: Lower body.
- Push/Pull Split (4×/week) – Monday: Push (chest, shoulders, triceps). Tuesday: Pull (back, biceps). Thursday: Push. Friday: Pull.
Final Words
Start with the routine and the warm-up, pick the right equipment for your level, and focus on clean form, then add weight or reps when it feels manageable.
You’ve got exercises from bodyweight to advanced, clear progressions and regressions, and simple weekly templates plus recovery tips to keep you consistent.
Make this upper body strength workout one you can repeat week after week. Small, steady steps add up, and you’ll notice real strength and posture wins before long.
FAQ
Q: What is the best exercise for upper body strength?
A: The best exercise for upper body strength is a compound move—like pull-ups or bench press—because it trains multiple muscles, lets you add load, and builds strength faster than isolation lifts.
Q: What is the 3-3-3 rule for working out?
A: The 3-3-3 rule for working out is doing three sets of three reps (3×3) to build maximal strength, progressing weight when you hit all reps; it’s a low-volume, high-intensity template for compound lifts.
Q: Can I lift weights with fibromyalgia?
A: You can lift weights with fibromyalgia by starting light, using short sessions, avoiding flares, prioritizing form, and increasing load very gradually; check with your doctor and stop if pain worsens.
Q: What is the 5 5 5 30 rule?
A: The 5 5 5 30 rule refers to doing five sets of five reps with 30 seconds rest, commonly used for conditioning and hypertrophy; choose weight that makes the last reps challenging but controlled.